I Nearly Retired

Manufacturing Profits you can retire on

I was talking with one of our past clients a little while ago. They told me they had a problem. They said, “Ray, I nearly retired“! So I asked them what that meant. And they explained.


We had developed a product for them a decade ago. The total project cost then around $50,000 as it included both the product Electronics Design, Embedded Software and also the Automated Test Equipment (ATE) for Production Test which also had an Electronics Design, Embedded Software and Windows PC ATE Software component to it. And from that product they made nearly $2,000,000 in retained profit. From their perspective, nearly enough to retire on. And since they own the company it is theirs to distribute as they please. Now they wanted to do it again. So we are onto another very exciting Product Development for them. Can’t say any more about that yet.


So I thought about the value proposition here. The maths says:


2,000,000 / 50,000 = 40:1 Return On Investment (ROI).


And that ignores the total value of the economic activity and profits their suppliers and customers have made.


Return On Investment (ROI)

Return On Investment (ROI)

Manufacturing Spearheads Economic Growth

The Victorian Government estimates that every $1 spent with a business like Successful Endeavours, there is $100 of overall economic value generated for the state. Makes you wonder why they don’t invest themselves? They used to through things like the Technology Voucher Program but all of that is currently shut down.


And of course there are the jobs this generates. Again, Victorian Government estimates are that every job in manufacturing creates another five jobs around it in the supply chain and supporting businesses. That is the highest ratio of any industry.


So what’s not to love about Australian Manufacturing! Let’s look at the benefits:


  • creates fundamental value (so the service sector has something to leverage off)
  • creates jobs and then more indirect jobs than any other industry so it is great for employment
  • creates profits


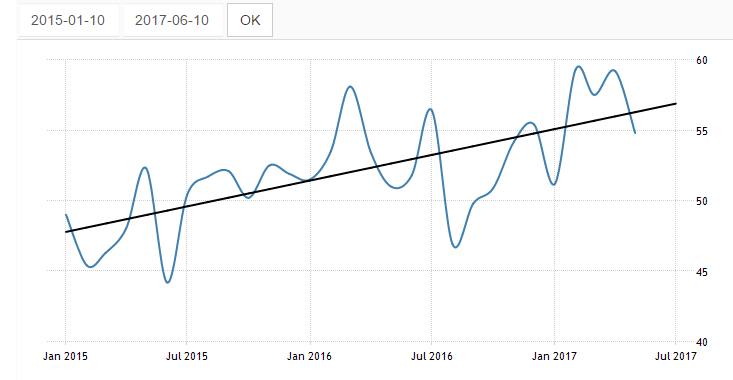
And far from being in decline, the Australian Manufacturing PMI has been in growth most of the past  2 years so that is also really positive for the overall economy. Check out he graph below from the Australian Industry Group (AIG).


Australia Manufacturing PMI 2015-2017 shows growth the whole way

Australia Manufacturing PMI 2015-2017 shows growth the whole way

The above graph was created by Trading Economics. They provide a a useful way to use the AIG Australian Manufacturing PMI figures to get reports in the format you want. If you explore it more deeply, you can see that we took a hit to Australian Manufacturing during the Global Financial Crisis (GFC) but it has been an upward trend from then on.


AIG

AIG


Go Australian Manufacturing!


Successful Endeavours specialise in Electronics Design and Embedded Software Development, focusing on products that are intended to be Made In Australia. Ray Keefe has developed market leading electronics products in Australia for more than 30 years. This post is Copyright © 2017 Successful Endeavours Pty Ltd.

Electronics Design: PCB Layout

PCB Layout

After the Schematic Capture component of the Electronics Design  is complete, the logical connections for the electronics components have been determined. If the Electronics CAD package also supports it, you can add rules to guide the Printed Circuit Board Layout, also abbreviated to PCB Layout which we will use from here on.


The PCB provides both the mechanical support for the components and is many cases is a critical part of the circuit since the length of tracks, their thickness, their clearance from other tracks and the relative placement of components and tracks can significantly influence the final performance of the PCB. This is particularly true as power levels, clock speeds or frequency increases.


The Electronic Schematic defines the electrical connections between components, the value of components such as resistors, capacitors and inductors, the type of semiconductors used (silicon chips) and the connectors that take signals and power on and off the PCB. Each item on the schematic has to be linked to a physical shape that will go onto the PCB. This is done by assigning a footprint to the schematic item.


Schematic Symbol

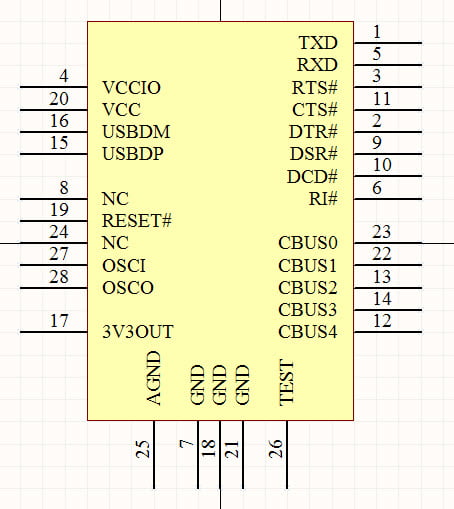
I will explain  it works. The Schematic Symbol for an FT232RL USB Serial Interface device is shown below. This is arranged with the signals conveniently placed to suit logical connections and to make the overall Schematic easy to read and understand.  The signal name is shown inside the symbol boundary, and the pin number of the IC package is shown on the outside.


FT232RL Schematic Symbol

FT232RL Schematic Symbol

Schematic Circuit

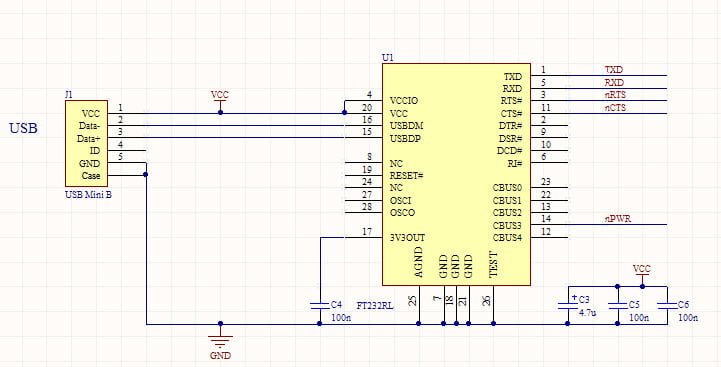
So this  is the symbol for a single part, an IC or Integrated Circuit. The Schematic Circuit or Electronic Schematic shows the connections to the other parts of the circuit. Below we see USB connector wired up the the FT232RL IC and the power supply bypass capacitors. The logic level UART signals are shown at the top right. This section of the Electronic Schematic provides the logical connections for a USB serial interface.


FT232RL USB Schematic

FT232RL USB Schematic

PCB Footprint

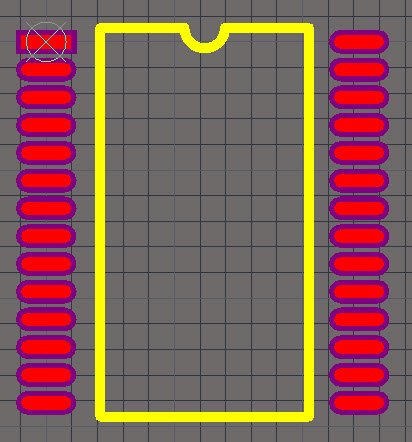
Before we can do the PCB Layout, we have to associate the PCB Footprint each Schematic Symbol will use. The PCB Footprint for the FT232RL IC is shown below.


FT232RL PCB Footprint

FT232RL PCB Footprint


This is one of the 2 possible footprints for the FT232RL. This one is a 28 pin SSOP package.


Once each Schematic Symbol has a PCB Footprint, we are ready to do the PCB Placement.


PCB Placement

The first step is to create the outline for the PCB and its mounting points, then to place each PCB Footprint so it is in the correct place. For some components, such as connectors, there is a specific place it must go. For other components, there is more freedom to choose the position and there are groups of components that must be in a specific relationship to each other. An example of this are the power supply bypass capacitors which must go very near to the IC they are supporting.


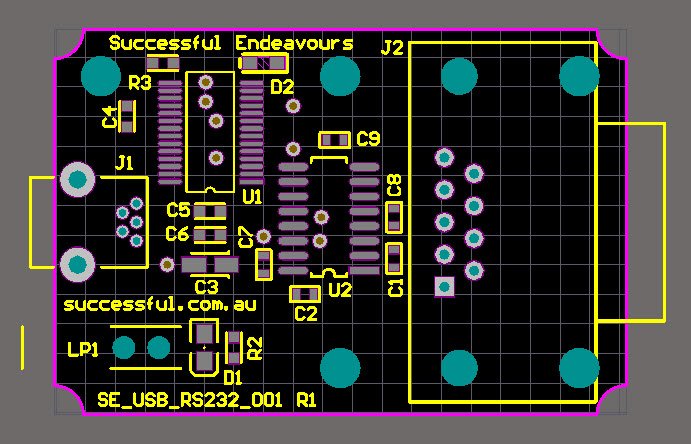
An example of a completed PCB Placement is shown below. This is a USB to RS232 serial converter.


PCB Unrouted

PCB Unrouted

PCB Routing

Now we have the components where we want them, we turn on the auto-router and the PCB is finished. Sorry but I couldn’t help that. The auto-routing features of most PCB Layout CAD software packages are never as good as doing it yourself. They can be useful for testing the ease of routing for a particular placement. There are a lot of manufacturing considerations that need to be taken into account and track size requirements, either for current carrying or voltage drop, can be hard to define from just the schematic. And example of this is the main system voltage such as VCC. In some parts of the circuit the required current is low so smaller track sizes are OK, whereas other areas need heavier tracks. It isn’t easy to define this at the schematic level because they are all the same signal or Net.


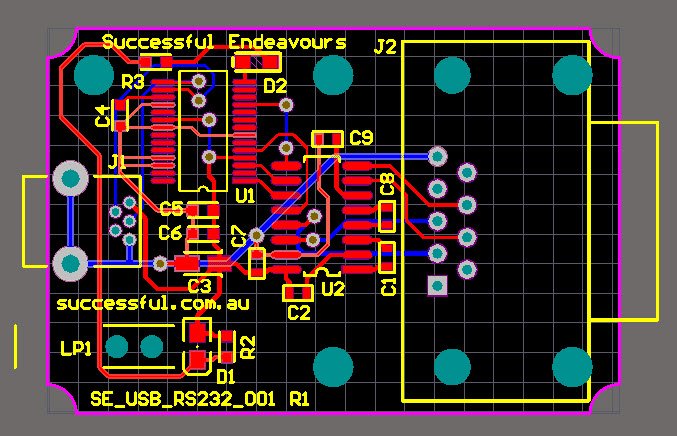
The PCB with the routing complete is shown below. The selection of track size is related to the current the circuit needs to carry. A good reference for determining the track size is provided by the standard IPC-2222A.


PCB Routed

PCB Routed

PCB 3D Cad Integration

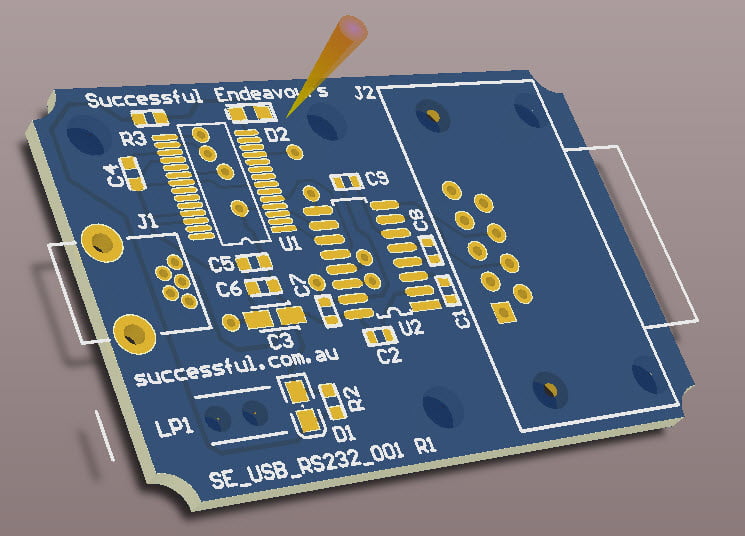
It is also important to make sure the PCB will fit into a mechanical enclosure. Most modern PCB CAD tools, such as Altium Designer which we use, can create full 3D models of the PCB. Shown below is an example of just the PCB without the components showing.


3D PCB View

3D PCB View


So there we have it. A PCB taken from the completed Electronic Schematic through to a PCB Layout.


Next we will look at prototyping our new PCB.


Successful Endeavours specialise in Electronics Design and Embedded Software Development. Ray Keefe has developed market leading electronics products in Australia for nearly 30 years. This post is Copyright © 2015 Successful Endeavours Pty Ltd.

Fine Pitch PCB

Fine Pitch Printed Circuit Board

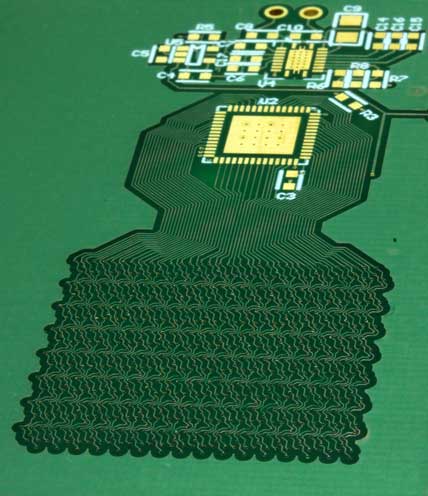
This example is from a project coming to the end of the Proof of Concept phase. So we have done the Electronics Design and also completed the PCB Layout. I can’t tell you what it does, but you don’t really need to know in order to appreciate the technology. This is an example of a Fine Pitch PCB or Fine Pitch Printed Circuit Board. And even better, it was made right here in Melbourne, Australia.


Pictures first.


RGB Light Emitting Diode Array

RGB Light Emitting Diode Array

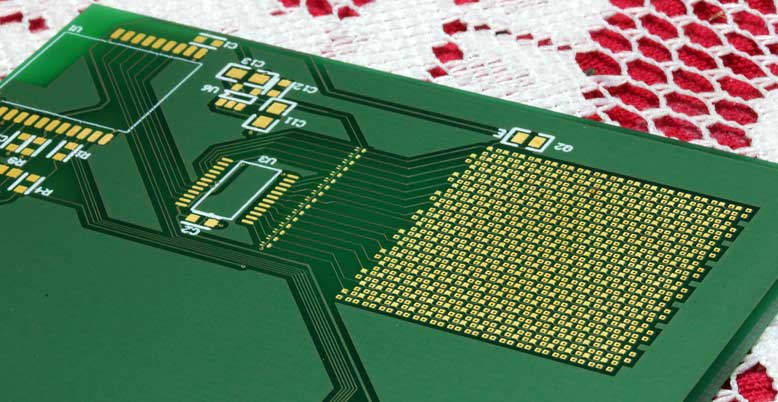
Above we have the top surface of a Prototype PCB that drives a 16 x 16 or 256 RGB LED array. The size is 25mm square for the LED Array. You might also have realised that this is a custom RGB LED display. The display is driven as a row x column matrix. This top side has the 16 row drivers.


RGB LED Array Bottom Side

RGB Light Emitting Diode Array Bottom Side

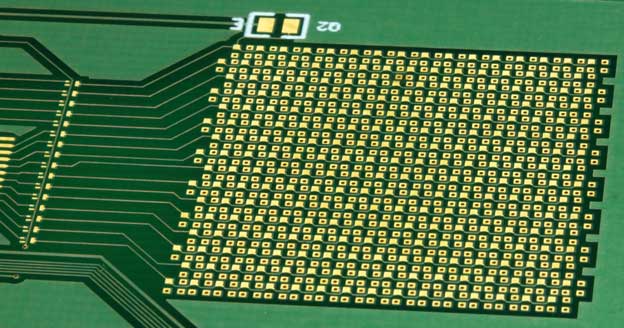
This is the underside with the 16 x 3 = 48 column drivers.


RGB LED Array Detail

RGB LED Array Detail

This shows some more detail where the Sea of RGB LEDs is sitting. They are in a staggered offset to reduce jagged edges on the image when it is displayed.


RGB LED Arracy Close Up

RGB LED Arracy Close Up

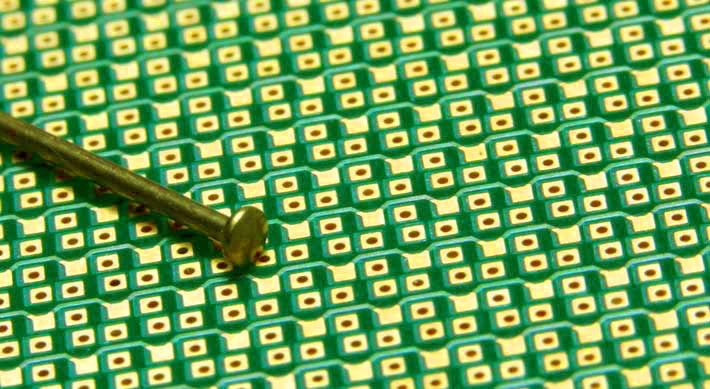
This final picture is a close up of the RGB LED array with a lace pin as a size reference. The RGB LEDs are 1mm wide and the pin head is a bit less than 1mm across. This is the smallest pin I could find.


Fine Pitch PCB Technology

Now for some technical details:


  • 4 mil track width (that is 0.1 mm)
  • 4 mil clearance (that is also 0.1 mm)
  • 0.25 mm via hole diameter


The Prototype PCB was manufactured by PCB Fast. We used them for our Prototype PCBs because they manufactured in Australia. And that is part of our focus, maintaining manufacturing in Australia. So I was very impressed with the work they did and thought this was a great way to show what they can do. I was also impressed with the spirit of adventure Kevin and Leeanne had in taking this one on.


One day I’ll be able to tell you what it was for.


Successful Endeavours specialise in Electronics Design and Embedded Software Development. Ray Keefe has developed market leading electronics products in Australia for nearly 30 years. This post is Copyright © 2015 Successful Endeavours Pty Ltd.

Electronics Design: Component Selection

Component Selection

We have worked our way through Requirements Capture and Technology Selection. After doing some initial design work and deciding on how the circuit will work, you have to find components that you can buy on a reasonable lead time and at a reasonable price. This depends a lot on the expected production volume because if the volumes are low then you might not be able to secure the components you prefer.


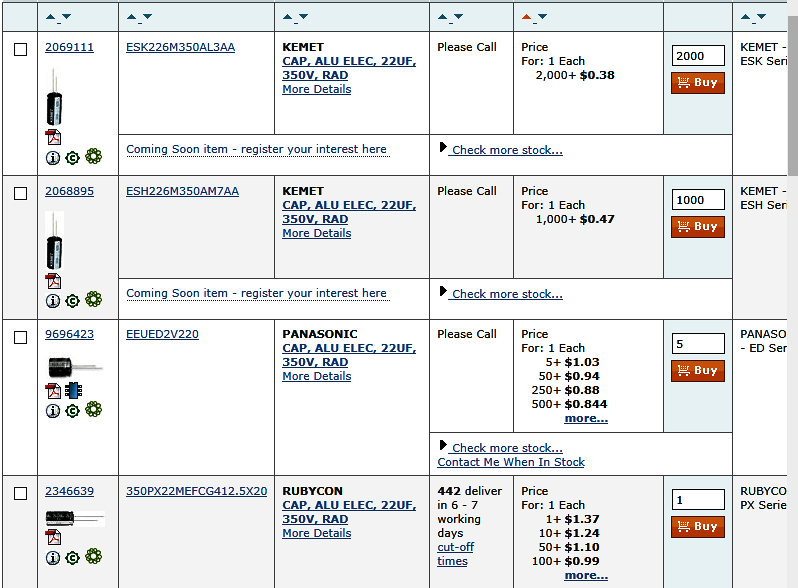
For products Made in Australia, the typical production volumes are less than 5000 units per annum. Products in this category are niche or low volume products and are generally defensible internationally because of the special and targeted nature of the products. But it does introduce a complication. You don’t have much of a bargaining position with suppliers. In this circumstance you often have to look at what you can buy and from who. This will involve looking at both local distributors and international sellers of components. An example from Element 14 is shown below for options for a 22uF 350V radial leaded capacitor:


Component Selection

Component Selection

And once selected, you might have to go through this exercise for each subsequent production run. Whereas much higher volume products can negotiate forward schedule orders and secure components in advance of their being required. So each product and production run needs to be handled according to your specific circumstances.


External events can also influence component availability. As an example,after the 2011 earthquake in Japan there were many components that were in short supply for up to 6 months.


This is one of the things you look for in a Niche Electronics Manufacture supplier, the ability to handle the component selection not only for the first production run but for subsequent runs.


Successful Endeavours specialise in Electronics Design and Embedded Software Development. Ray Keefe has developed market leading electronics products in Australia for nearly 30 years. This post is Copyright © 2014 Successful Endeavours Pty Ltd

Electronics Design: Technology Selection

Technology Selection

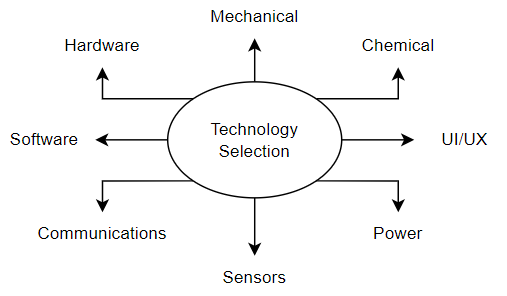
Before we look at how to choose a Technology, what does Technology mean?

In very general terms, Technology is understanding how stuff works and how to get it to do what you want.
Technology Selection

Technology Selection

There is lots of different stuff available. In the case of Electronics Design this stuff is the type of Electronics you will use and how you will make use of it. The most important choice to make is to determine:

  • What functions will I implement using Electronic Hardware ?
  • What functions will I implement using Embedded Software ?
  • What functions will I implement using local or Remote Communications ?
  • What does the user do?
  • How is it powered?
  • How is it packaged?
  • Does it need to sense anything?
  • Does it involve any chemical processes?

In looking at the answers to these questions I also need to consider:

  • Cost to Design
  • Cost to Manufacture
  • Cost to support
  • Production Volume
  • Power Consumption
  • Performance
  • Time to market

In the process of Product Development it is often Technology Selection that can make the biggest difference.


Electronics Hardware

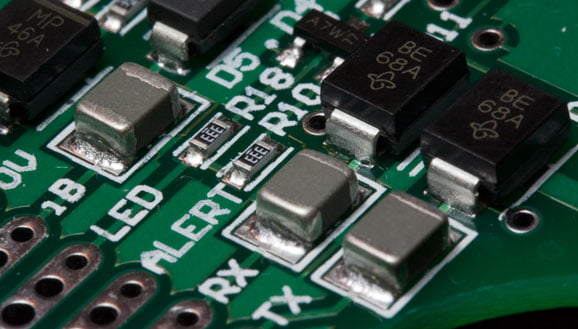
If there is no software involved, then this is the choice of which devices can be used to implement the design and how best to use them.
Electronics Hardware

Electronics Hardware

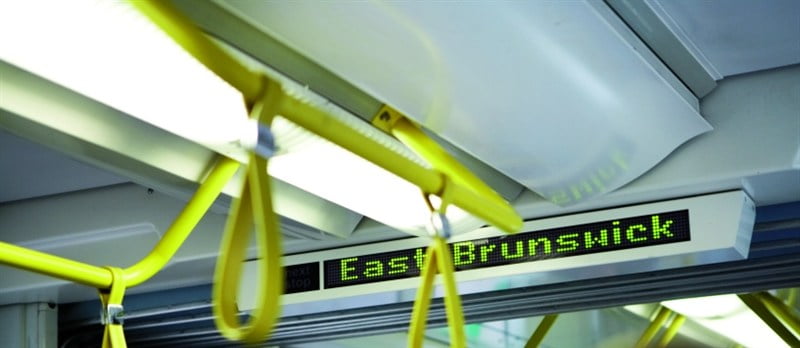
A recent example for us was the interface and power supply for a new GPS module for the Yarra Trams Passenger Information Systems. There was a problem with the existing GPS modules in scenarios where buildings either side caused the GPS module to lose position. And guess what you have a lot of in the central part of a city? That’s right, taller buildings. The Passenger Information Systems required an accurate GPS position to work correctly. So the GPS module had been selected including the use of dead reckoning to update the position based on the wheel rotation and the interface between this and the rest of the tram had to be designed including some level shifting to adjust voltage levels. We also manufactured the interfaces for them.
Yarra Trams VPIS

Yarra Trams VPIS

So that is an example of a project that required no Software.

But most of the time there will be Embedded Software involved. And there are several really good reasons for this:

  • Embedded Software costs less in manufacture – see Reducing Electronics Manufacturing Parts Cost
  • Embedded Software is extremely flexible
  • Embedded Software can test itself
  • Embedded Software improves field support, service and upgrade capability
  • The Electronics Hardware to run Embedded Software gets cheaper every year
  • Remote Communications is getting cheaper all the time

So today we spend 80% of our time writing Embedded Software in C and C++ to run on the Electronics Hardware we design through the PCB Prototype or even Production. This is known as an Embedded System.

For this typical project type we do as much in Software as we can.


Embedded Software

Embedded Software is the software that runs on the Electronics Hardware. Unless the product must be super Low Power Electronics, we will do everything in Software except for the power supply and physical interfaces to the outside world. But there are a few caveats:

  • signal filtering is usually more power effective in Analog Electronics than DSP
  • sleep and wake timing for high powered systems is often best done with external Electronics Hardware
  • you have to be able to select a Microcontroller that has the right combination of price, features and performance

Embedded Software

Embedded Software

Given the enormous range of devices available today you would think the last point was easily covered but a recent project we did ended up with only 1 possible choice in the whole world for the Microcontroller. Here is the requirements list:

  • Run from a button cell for at least 2 years
  • Has a beeper
  • Has an LED
  • Operated from -20C to +70C
  • After a period of dormancy, start flashing the LED and activating the beeper
  • Beeper frequency, on time, off time, number of cycles and gap time are configurable
  • LED on time, off time, number of cycles and gap time are configurable
  • Dormant period is configurable
  • Unit timing must be accurate to better than 1 hour per year
  • Unit price in 100K quantities must be less than US$1
  • Software must be protected from copying

The solution was an MSP430 based device from Texas Instruments with a 32KHz crystal. Actual cost ended up at US$0.71. And absolutely everything was done in Software.


Remote Communications

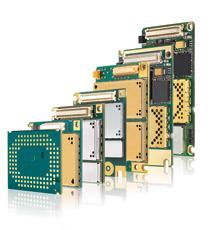
With ubiquitous Internet enabled devices, knows as the Internet of Things or IoT, it is more cost effective than ever to add Remote Communications to products. This can have many benefits that reduce the cost of field and service support for a product and also makes possible features you could not have provided any other way.
Remote Communications GSM Modem Cinterion

Remote Communications GSM Modem

An example from a recent water metering project we undertook. This is a remote water dispensing system, also known as a Bulk Filling Station, that records who took water, how much water, when and where. The transaction is sent to a website via GSM modem and the Council can get the records to bill for the water without having to travel. It also means the tanker drivers don’t have to manually fill out log books and the Council don’t have to chase them for the data. Great savings there alone. But there were some extra benefits for us and the client that they hadn’t considered. These were:

  • Remote updates to the system application
  • Maintenance monitoring of batteries and valves
  • Regular check in to confirm the system was still operational

So if a new feature is needed, we can update the software and remotely distribute it the units in the field. Since these are currently spread over half of the east half of Australia that is an enormous saving.
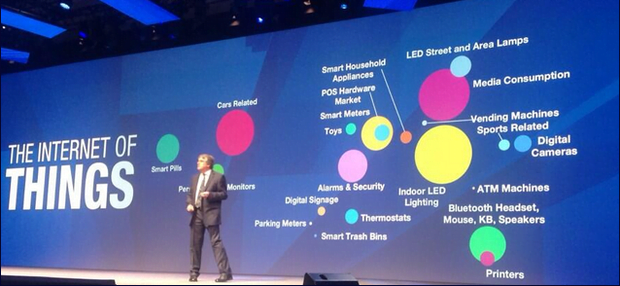
Internet of Things - IoT

Internet of Things – IoT

And we can also determine when the batteries need to be swapped out so that can be a preventative maintenance operation at a time of the Council’s choosing and not an emergency call out when a truck driver can’t get water. It is quite common for the first tanker to fill up before dawn when the solar charging has been off overnight and the temperature is at its minimum for the day. The worst timing from the batteries perspective so it just works better all round if we known for sure how the batteries are travelling by keeping track. It also means that if a solar panel is damaged the Council can see there is an issue before the system stops working.

And the regular check in allows the Council to know if a unit is still operational or not. A recent example from NSW was a fire fighting crew going to a water dispensing point to refill their tanker during a bushfire only to find it had failed sometime last winter and never been repaired. With Remote Communications you can avoid that and although it costs more to design, manufacture and operate (due to SIM costs) it can still reduce the overall cost of a system significantly.

So that is the general process. Once we have decided what we will do in Electronics Hardware, Embedded Software and how much Remote Communications to use we are ready to get into the Electronics Design in detail.


And of course, no post like this is complete without an input from Dilbert.


Technology Selection - Get It Right

Technology Selection – Get It Right

Successful Endeavours specialise in Electronics Design and Embedded Software Development. Ray Keefe has developed market leading electronics products in Australia for nearly 30 years. This post is Copyright © 2014 Successful Endeavours Pty Ltd.